
3D Preview
The centre panel renders the selected garment on a real freemode ped — mp_m_freemode_01 or mp_f_freemode_01, extracted from your own GTA V install — with your .ytd textures applied. It is where you judge fit, texturing, clipping and silhouette before you build anything.
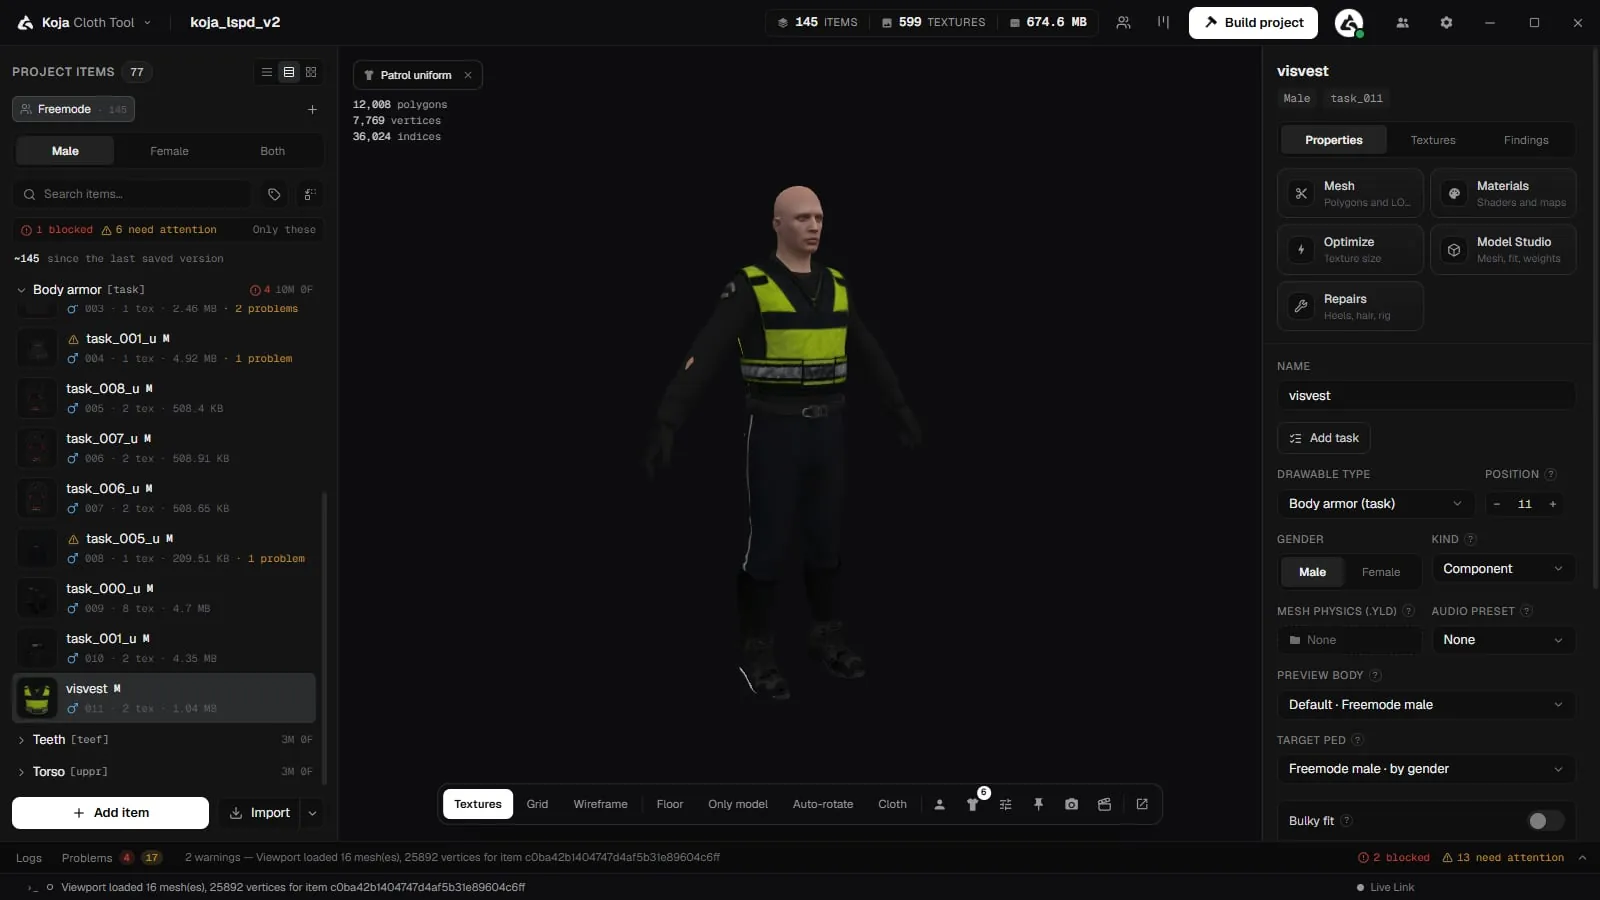
It is not a still image. The ped can play the game's own animations, and a garment that ships cloth data can be simulated.
The 3D preview is free. Previewing on peds from the Ped Library is Premium.
Moving the camera
| Action | Control |
|---|---|
| Orbit | Left drag |
| Pan | Middle drag, right drag, or Shift + left drag |
| Turn the model under fixed lights | Shift + middle drag |
| Zoom | Mouse wheel (towards the pointer) |
| Front / Back / Left / Right | Viewport options → Scene → Camera angle |
| Reset camera | Viewport options → Scene → Reset camera |
The viewport bar
The bar along the bottom of the preview holds the switches and the menus:
| Control | What it does |
|---|---|
| Textures | Turns textures on or off, and opens the menu of ways to draw the mesh (below). |
| Grid, Wireframe, Floor | Drawing aids. |
| Only model | Hides the ped and shows the selected garment on its own. |
| Auto-rotate | Turns the model slowly. |
| Cloth | Opens the cloth simulation panel. See Cloth simulation. |
| Person icon | Ped animation: walk, run, jump and more. See Animations. |
| Shirt icon | The Appearance Menu: ped, outfit and look. |
| Sliders icon | Viewport options: lighting and scene. |
| Pin icon | Locked in preview: keep other items on the ped while you switch between items. |
| Camera icon | The Photo Studio. |
| Clapperboard icon | Stage this garment in the Scene Creator. |
| Expand icon | Pops the preview out into its own window. |
When the preview is narrow, the switches fold into one Show button.
What the viewport draws
The Textures button opens a menu of five ways to draw the same mesh.
| Mode | What it is for |
|---|---|
| Shaded | The normal view — textures and lighting. |
| Normals | Geometry normals as colour. A face lighting up the wrong way here is inverted in game too. |
| UVs | The texture coordinates themselves — red across, green up. |
| Checker | An even grid on the UVs. Squares that come out stretched are stretched in the texture too. |
| Flat | No texture and no shading. Silhouette and geometry on their own. |
With Wireframe on, you can also set its Colour and Opacity, and switch on Garment edges only to leave the ped solid.
The corner readout gives polygons, vertices and indices for the selected garment, not for the whole ped.
Normal and spec maps
New in 2.0.9. In Shaded, the preview uses the same three maps the game does, not only the colour texture:
- Normal map: seams, folds, stitching and quilting catch the light the way they do in game, even where the mesh itself is flat.
- Spec map: gives leather, vinyl, rubber and skin their highlight. It is read with the shader's own intensity, falloff and fresnel, so a material is as shiny as it is in game, not more.
- A garment without a spec map stays matte, as cotton does in game.
The maps come from where the game reads them. If a garment is linked to a loose .dds or .png diffuse, the normal and spec maps stored in its model are still shown.
To make normal and spec maps for a garment that has none, use the Material Editor.
Viewport options
The sliders button opens Viewport options with two tabs, Lighting and Scene. The ped and its body moved to the Appearance Menu in 2.0.8.
Lighting
Time of day is one slider, and it is the whole lighting rig. It moves the sun, its colour, and the light coming off the sky. Every hour has its own sun, sky and exposure, the way the game does it.
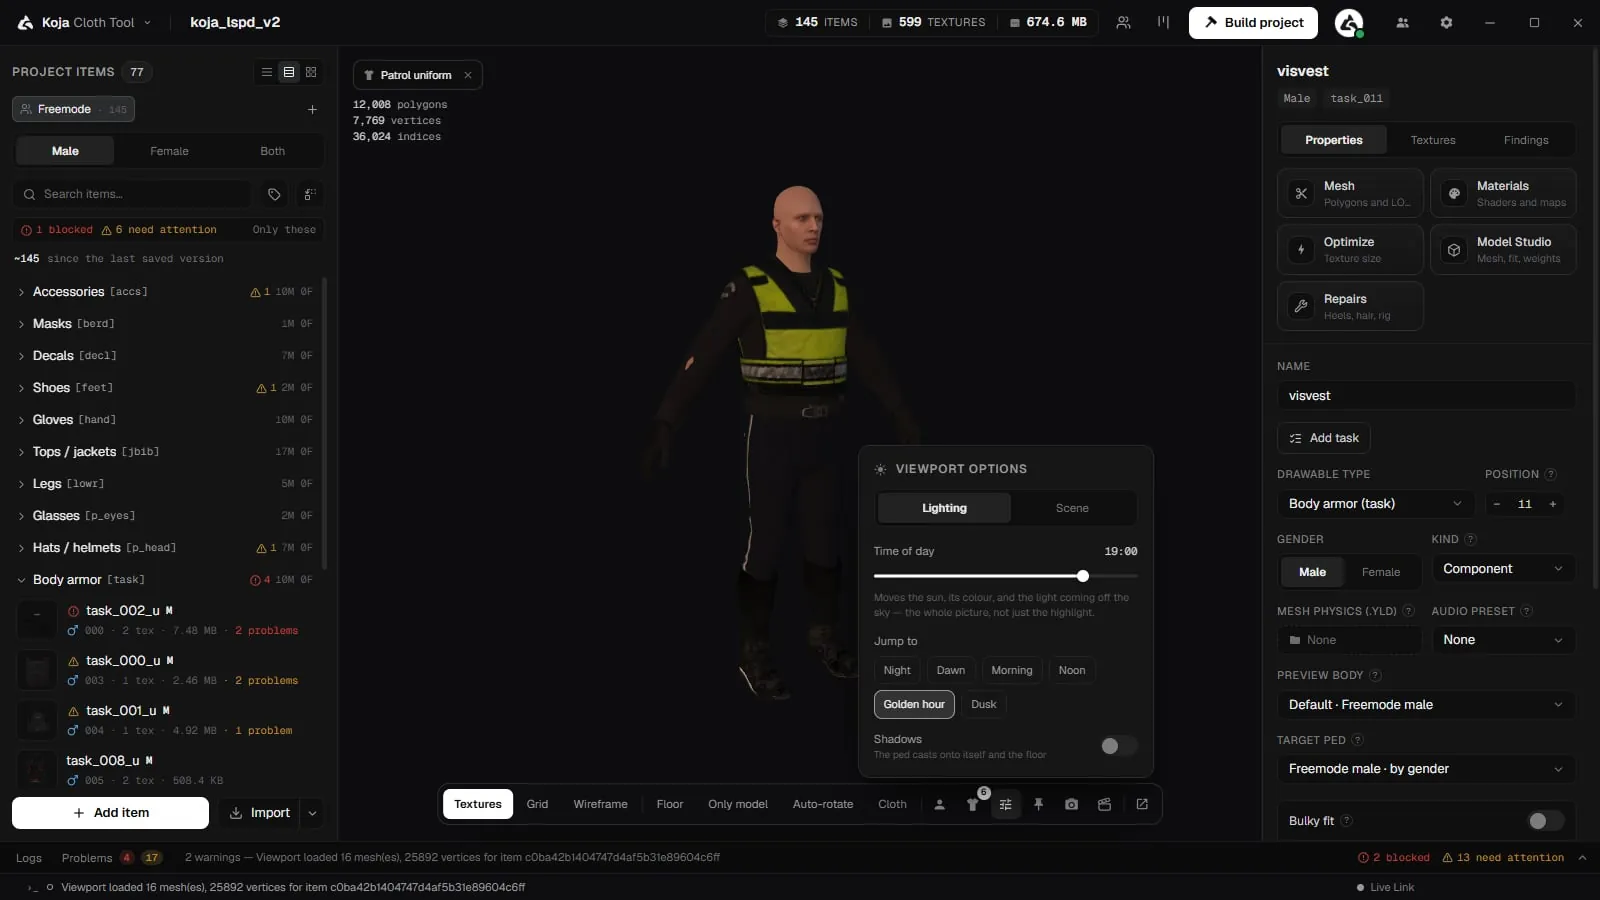
Under it, Jump to has six presets: Night, Dawn, Morning, Noon, Golden hour and Dusk. A garment that reads well at noon and dies at dusk is worth knowing about before it ships.
Shadows makes the ped cast onto itself and onto the floor.
Scene
Backdrop — eight swatches (Studio, Charcoal, White, Greenscreen, Cyclorama, Sunset, Night, Overcast) or Use your own image…. The first four are flat colours, which is what a cut-out or a green screen needs.
Also here: Camera angle, Rotate speed, LOD (switches between the model's detail levels) and Reset camera.
The ped and its body
Everything about the person on the stage is in the Appearance Menu:
- Ped: freemode or a library ped, Dressed or Naked, Standing pose (A-pose or T-pose), Component ids, skin tone and saved bodies.
- Outfit: wear a saved outfit (Premium).
- Look: wet, muddy, worn, shiny or dyed fabric, and hair colours. View only.
Animation
The person icon on the bar opens the animation panel. Enable animation plays a move on the ped: the built-in moves (idle, walk, run, jump and more) are free; clip dictionaries and your own .ycd clips are Premium. See Animations.
This is what a garment actually has to survive. A coat that reads perfectly in the standing pose can fold through the leg the moment the ped walks.
Cloth
A garment that ships a .yld simulates in the viewport, using the constraints and pinned points from the file itself. See Cloth simulation.
When there is no ped
The preview needs your GTA V install to put a body under the garment. If it says so, click Set up GTA V (or point the tool at the game in Settings), then Extract base ped — it reads your game files once and caches the result.
A garment with no .ytd draws plain grey. That is the tool telling you it found no texture, not a rendering fault.
Textures not showing
If a garment renders untextured, it is nearly always one of two things: the .ydd has no UV coordinates, so there is nothing for a texture to map onto, or the texture names do not match what the model references.
Switch the Textures menu to UVs — if the model shows no coordinates there, that is your answer. See Common Errors.
Every garment looks grey or washed out
Check the Look tab of the Appearance Menu first. A dye left on there tints every garment in the preview, and is remembered between sessions. Since 2.0.9 a white dye means no dye at all, so it no longer greys garments out. Before 2.0.9, a white dye at full strength turned coloured parts, such as a green taser or a bodycam's red rings, grey.
The Look tab only changes the preview. It is never built into the pack.
The preview shows a different texture variant than the game
A texture variant whose .ytd names its texture differently from what the model asks for (for example diffuse_main_green for a model asking for diffuse_main) is shown, and built, under the model's name. Since 2.0.9 the preview and the item list pictures show the variant you picked. If the model itself stores a texture under the shader's name, that one wins, in the preview and in game.