

Building
When your project is ready, click Build project in the top bar. The build turns the project into a complete, drop-in pack: renamed stream files, the .ymt, the shop meta, the creature metadata and fxmanifest.lua.
Before you build
The build window checks the project first and shows the number of errors and warnings above the footer. Expand it to see each finding; clicking one that names an item takes you to that item.
- The build does not start while errors stand. Fix them, or ignore an error you accept in the item's Findings tab or in the Problems panel. Ignoring an error needs confirming.
- When errors are ignored, the button reads Build anyway (N ignored errors), so nobody ships them by accident.
- Many findings can be fixed in one go with Auto fix… in the Problems panel.
See Validation and Logs and Problems.
The build window
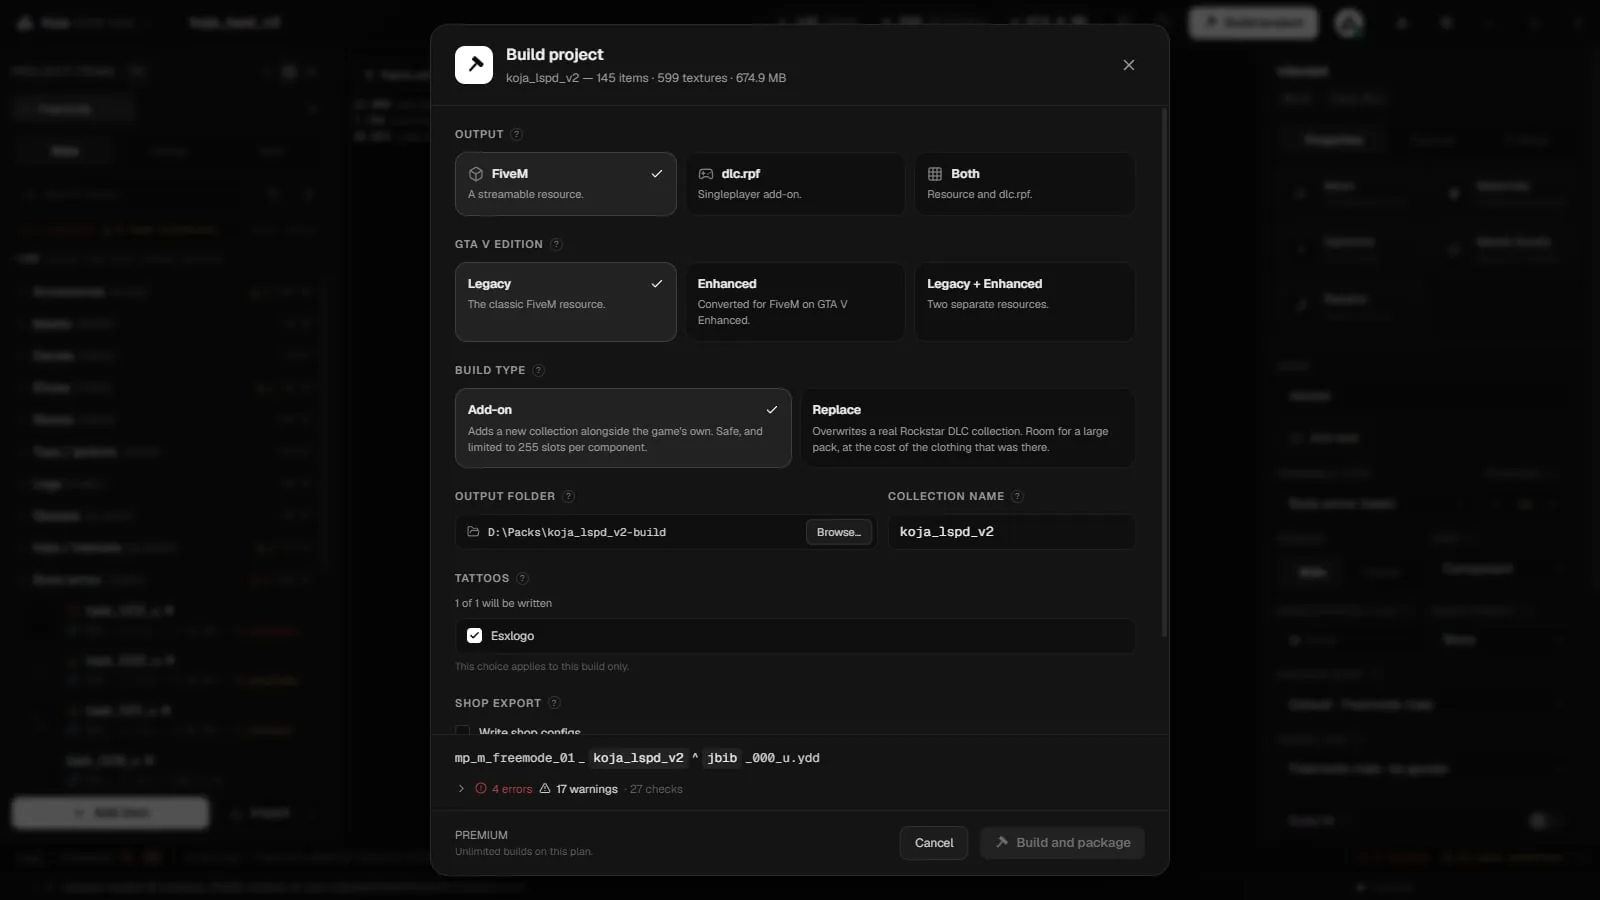
-
Output
Choose what the pack is for:- FiveM — a streamable resource for a server.
- dlc.rpf — a singleplayer add-on you install into the game.
- Both — the resource and the
dlc.rpf.
-
GTA V EDITION
For FiveM builds, choose Legacy, Enhanced or Legacy + Enhanced. It starts on the project's own setting. See GTA V Enhanced. -
BUILD TYPE
For FiveM builds, choose Add-on or Replace (see below). -
Output folder and COLLECTION NAME
The Output folder defaults to a folder next to your project, not inside it. Point it at your server'sresourcesfolder and the build is live after a restart. COLLECTION NAME is the name your add-on collection registers under; it appears in every built file name and is what a clothing script asks for. Lowercase letters and digits only. Left empty, it is taken from the project name. -
Build
The preview line shows the file name the build will write. Click Build and package. The build reports progress and can be cancelled. When it finishes, a summary lists what was written and any warnings. Adlc.rpfbuild says it packed a singleplayerdlc.rpf.
The build window also has sections for Tattoos (Tattoo Creator), Clothes for peds (see below), saved peds (Ped Creator), Escrowed resources (Escrowed Resources) and Shop export (Shop Metadata). Each appears only for FiveM builds, and only when it has something to show.
Clothes for peds
New in 2.0.8. Items built for a ped from the Ped Library are listed under Clothes for peds: one row per ped, with its garment count, the resource its clothes go into and anything that blocks it. Each ped's clothes go into a streamed ped resource of their own, together with the ped.
- Untick Build ped's clothes with this pack to leave that ped's clothes out of this build only.
- Build as ped pack… opens Build Ped Pack, which builds peds on their own: several at once, with or without their clothes, in one resource or one per ped.
- Ped resources are built for GTA V Legacy only. A build that targets only
dlc.rpfleaves them out and says so. - Shop entries, hair hiding, high-heel raise and props work on the freemode peds only. For other peds the build leaves them out.
Add-on or Replace
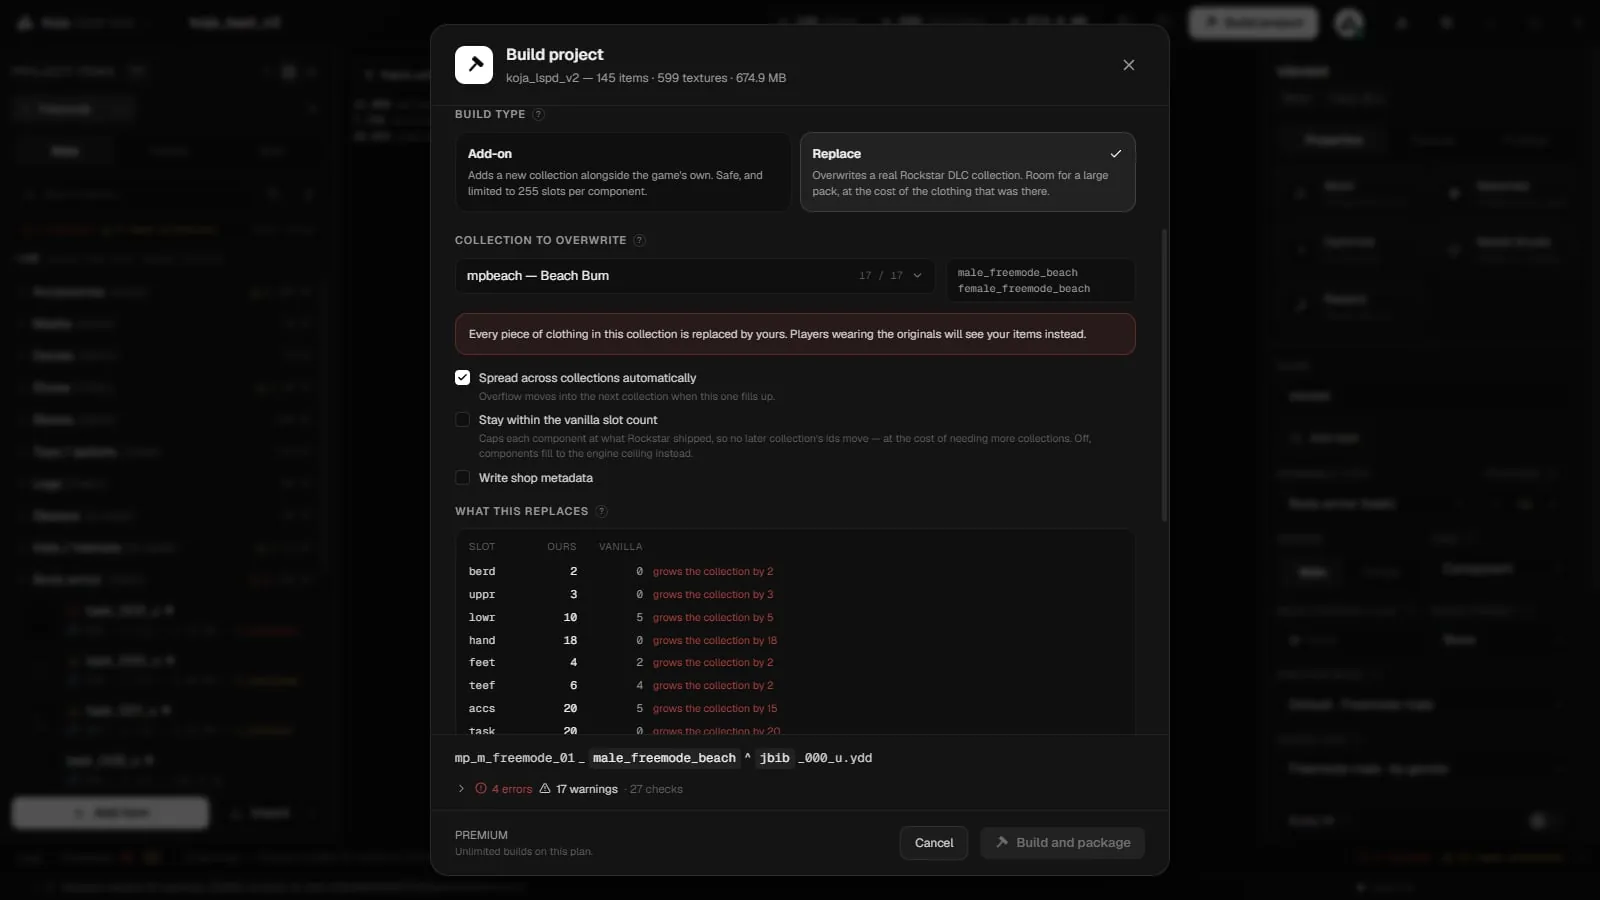
| Add-on | Replace | |
|---|---|---|
| What it does | Adds a new collection alongside the game's own. | Overwrites a real Rockstar DLC clothing collection that you pick by name. |
| Vanilla clothing | Untouched. | Every garment in that collection is replaced by yours, for every player. |
| Clothing scripts | Needs an add-on-aware clothing script. | Works with every clothing script; no add-on support needed. |
| Size | Up to 255 garments per slot per collection; bigger packs split automatically. | Room for a large pack. |
| Targets | FiveM, dlc.rpf or both. | FiveM only. |
Replace options
With Replace selected:
- Collection to overwrite — pick the Rockstar collection. The male and female collection names shown beside it are what ends up in every file name and in any clothing script.
- WHAT THIS REPLACES — a table of the slots your pack fills, with how many garments Rockstar shipped there. That column is not an allowance: it is how many vanilla garments disappear. You may go past it, but doing so shifts the drawable numbers of every collection loaded after this one, which breaks players' saved outfits.
- Spread across collections automatically — overflow moves into the next collection when this one fills up.
- Stay within the vanilla slot count — caps each slot at what Rockstar shipped, so no later collection's numbers move, at the cost of needing more collections.
- Write shop metadata — also writes a shop meta file.
A project imported from a resource that replaced a Rockstar collection keeps building as a replace. You can switch it back in Project settings → Output.
Automatic split
FiveM syncs at most 256 drawables per component in one collection, and a collection with exactly 256 is reported to read as empty. So an add-on build puts at most 255 garments per slot in one collection. A pack with more is split automatically into extra resources: my_pack, my_pack2, my_pack3…, each with its own collection named the same way. The checks warn you before the build.
There is no limit on texture variations per slot in total; only 26 per garment (a to z). See Limits.
Texture variants with their own texture names
A texture variant's .ytd sometimes names its texture differently from what the model asks for, for example diffuse_main_green in a variant of a model that asks for diffuse_main. The game would ignore that texture and show the model's default instead. Since 2.0.9 the build writes the variant's texture under the model's name, so the game shows the variant you picked. The build report lists each texture it renamed this way.
If the model itself stores a texture under the shader's name, that one wins, in the build and in game, as it always has.
What gets generated
A FiveM add-on build of a pack called koja:
koja/
├─ stream/
│  ├─ mp_m_freemode_01_koja/
│  │  └─ jbib/
│  │     ├─ mp_m_freemode_01_koja^jbib_000_u.ydd
│  │     ├─ mp_m_freemode_01_koja^jbib_diff_000_a_uni.ytd
│  │     └─ mp_m_freemode_01_koja^jbib_diff_000_b_uni.ytd
│  ├─ mp_m_freemode_01_koja.ymt
│  ├─ mp_creaturemetadata_koja.ymt
│  └─ ...
├─ mp_m_freemode_01_koja_shop.meta
├─ mp_f_freemode_01_koja_shop.meta
├─ pedalternatevariations.meta
├─ first_person_alternates.meta
└─ fxmanifest.lua
stream/— every model and texture, renamed to the exact GTA naming (ped and collection name, slot, drawable number, texture letter). You never rename anything by hand. See Naming. Loose.pngand.ddstextures are converted into real.ytdfiles..ymt— registers each drawable and its textures. Without it the files stream but nothing shows in the clothing menu.*_shop.meta— one per gender; lists the items for shops and menus.mp_creaturemetadata_<collection>.ymt— the creature metadata (see below).pedalternatevariations.meta— swaps hair to its cut-down version under masks.first_person_alternates.meta— written empty.fxmanifest.lua— ready, with every meta registered and your project's author and version.
With Advanced opened in the build window:
- Stream layout — Segregated (a folder per component, as above) or Flat (everything in one
streamfolder). The game reads both the same way. - Skip the extra .ymt — leaves
first_person_alternates.metaout. Nothing changes in game. - Skip alternate variations — leaves
pedalternatevariations.metaout. Hair will poke through masks. - Write an info dump — also writes
clothes_info.json(see below).
A dlc.rpf build writes a <name>_sp folder with dlc.rpf (containing content.xml and setup2.xml) and a README.txt with install steps for a mods folder. It is Legacy only.
Heels and hoodie hairs
New in 2.0.8. Every build includes the collection's creature metadata file. It is what makes an item's High-heel offset and Hoodie hairs settings, and hair squash under hats, actually work in game; before 2.0.8 these settings were written but nothing in the game read them. The build says when it adds the file. It counts as one more .ymt against the number a server can load, so on a server with many clothing packs it may be the one that does not fit.
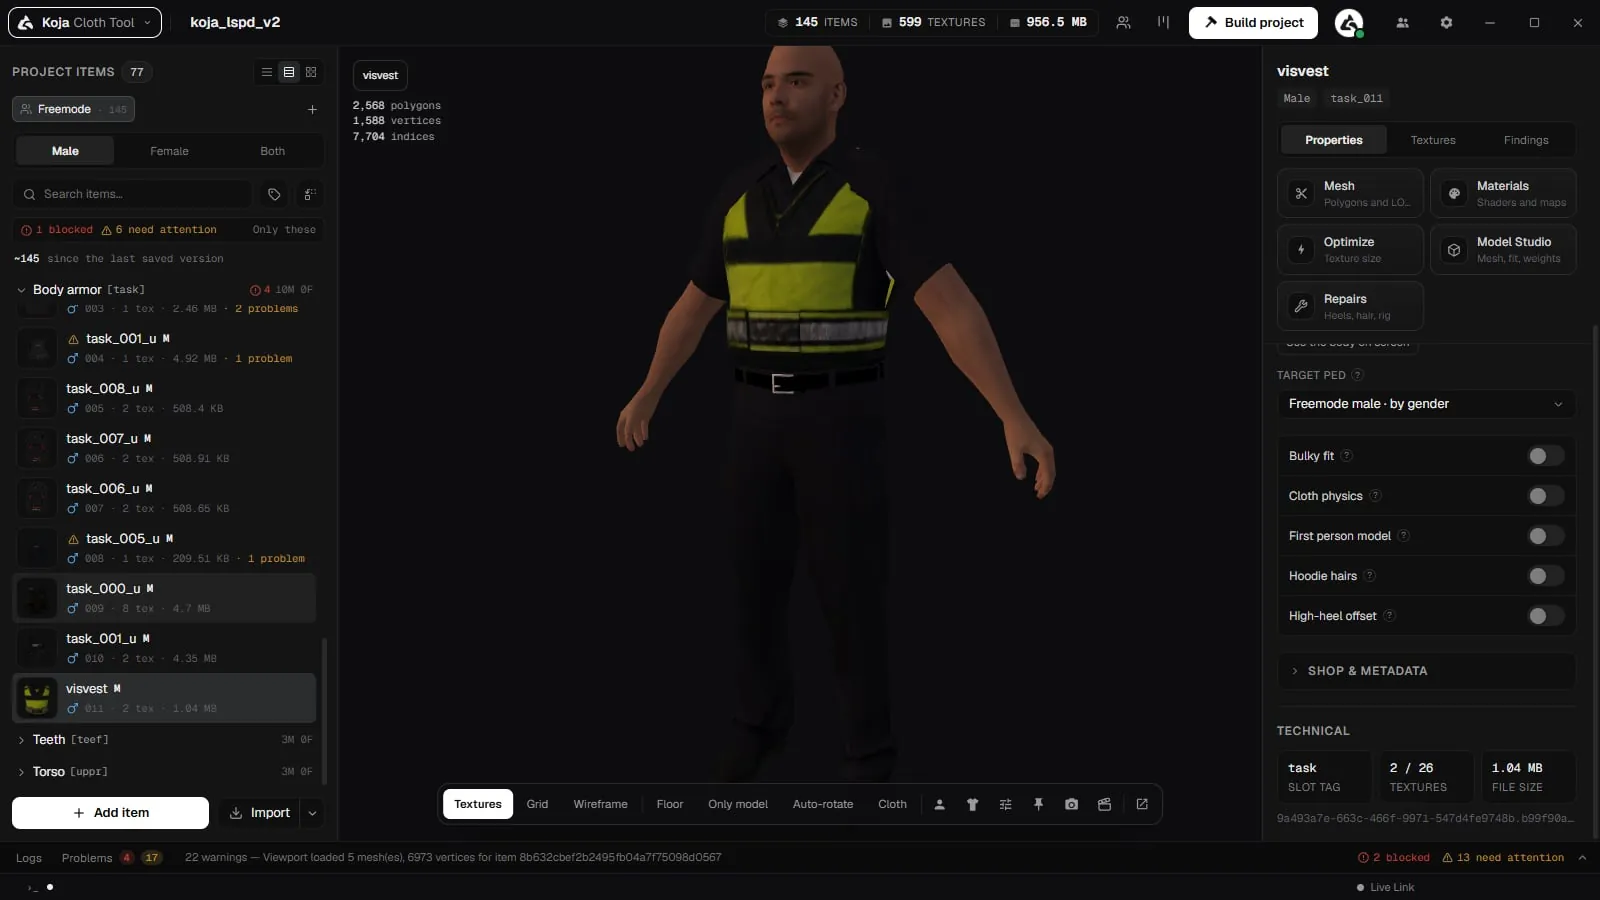
In a Replace build, heels and hair squash come from Rockstar's own creature metadata for that collection, which only covers as many items per slot as Rockstar shipped. An item past that point gets a warning: the effect will not apply to it. A build without shop meta also warns, because the shop meta is what points the game at the creature metadata.
clothes_info.json
Tick Write an info dump to get clothes_info.json: every packed item with its collection, slot, local index inside that collection, authored drawable number and texture sources.
It lists the collection and local index, not a global index, on purpose. When the server's game build changes, Rockstar's new DLC collections load first and every add-on garment's global number shifts; the collection and local index stay the same. Scripts that store outfits as (collection, local index) and use FiveM's collection-based natives keep working across game build changes.
Gender handling
Items are per gender: a male item builds under mp_m_freemode_01 and a female item under mp_f_freemode_01. Right-click an item and choose Create copy for other gender to have it on both peds.
Installing the result
- Copy every built folder into your server's
resourcesfolder. - Add
ensure your_packtoserver.cfg(andensure your_pack2and so on if the pack was split). - Restart the server.
Free and Premium
Building is part of the free plan, including Enhanced, Replace, dlc.rpf and automatic splitting. The free plan includes 8 builds in total; only successful builds count, and free builds need a linked Discord account (sign in from the profile menu). Premium builds without limit. When the free builds are used up, the build window says so. Builds started by an AI assistant count the same way.
Clothes for Ped Library peds, Build Ped Pack and the paid tools need Premium. On the free plan, clothes made for library peds are left out of the build with a notice instead of blocking it.