On the Home screen choose New project. Give it a Project name, pick a Location and, if your server runs GTA V Enhanced, change the Target game (new projects start on Legacy). Click Create project.
Already have a FiveM clothing resource? Use Import a FiveM resource (folder / .zip)… on Home instead, and the whole pack becomes a new project. See Importing.
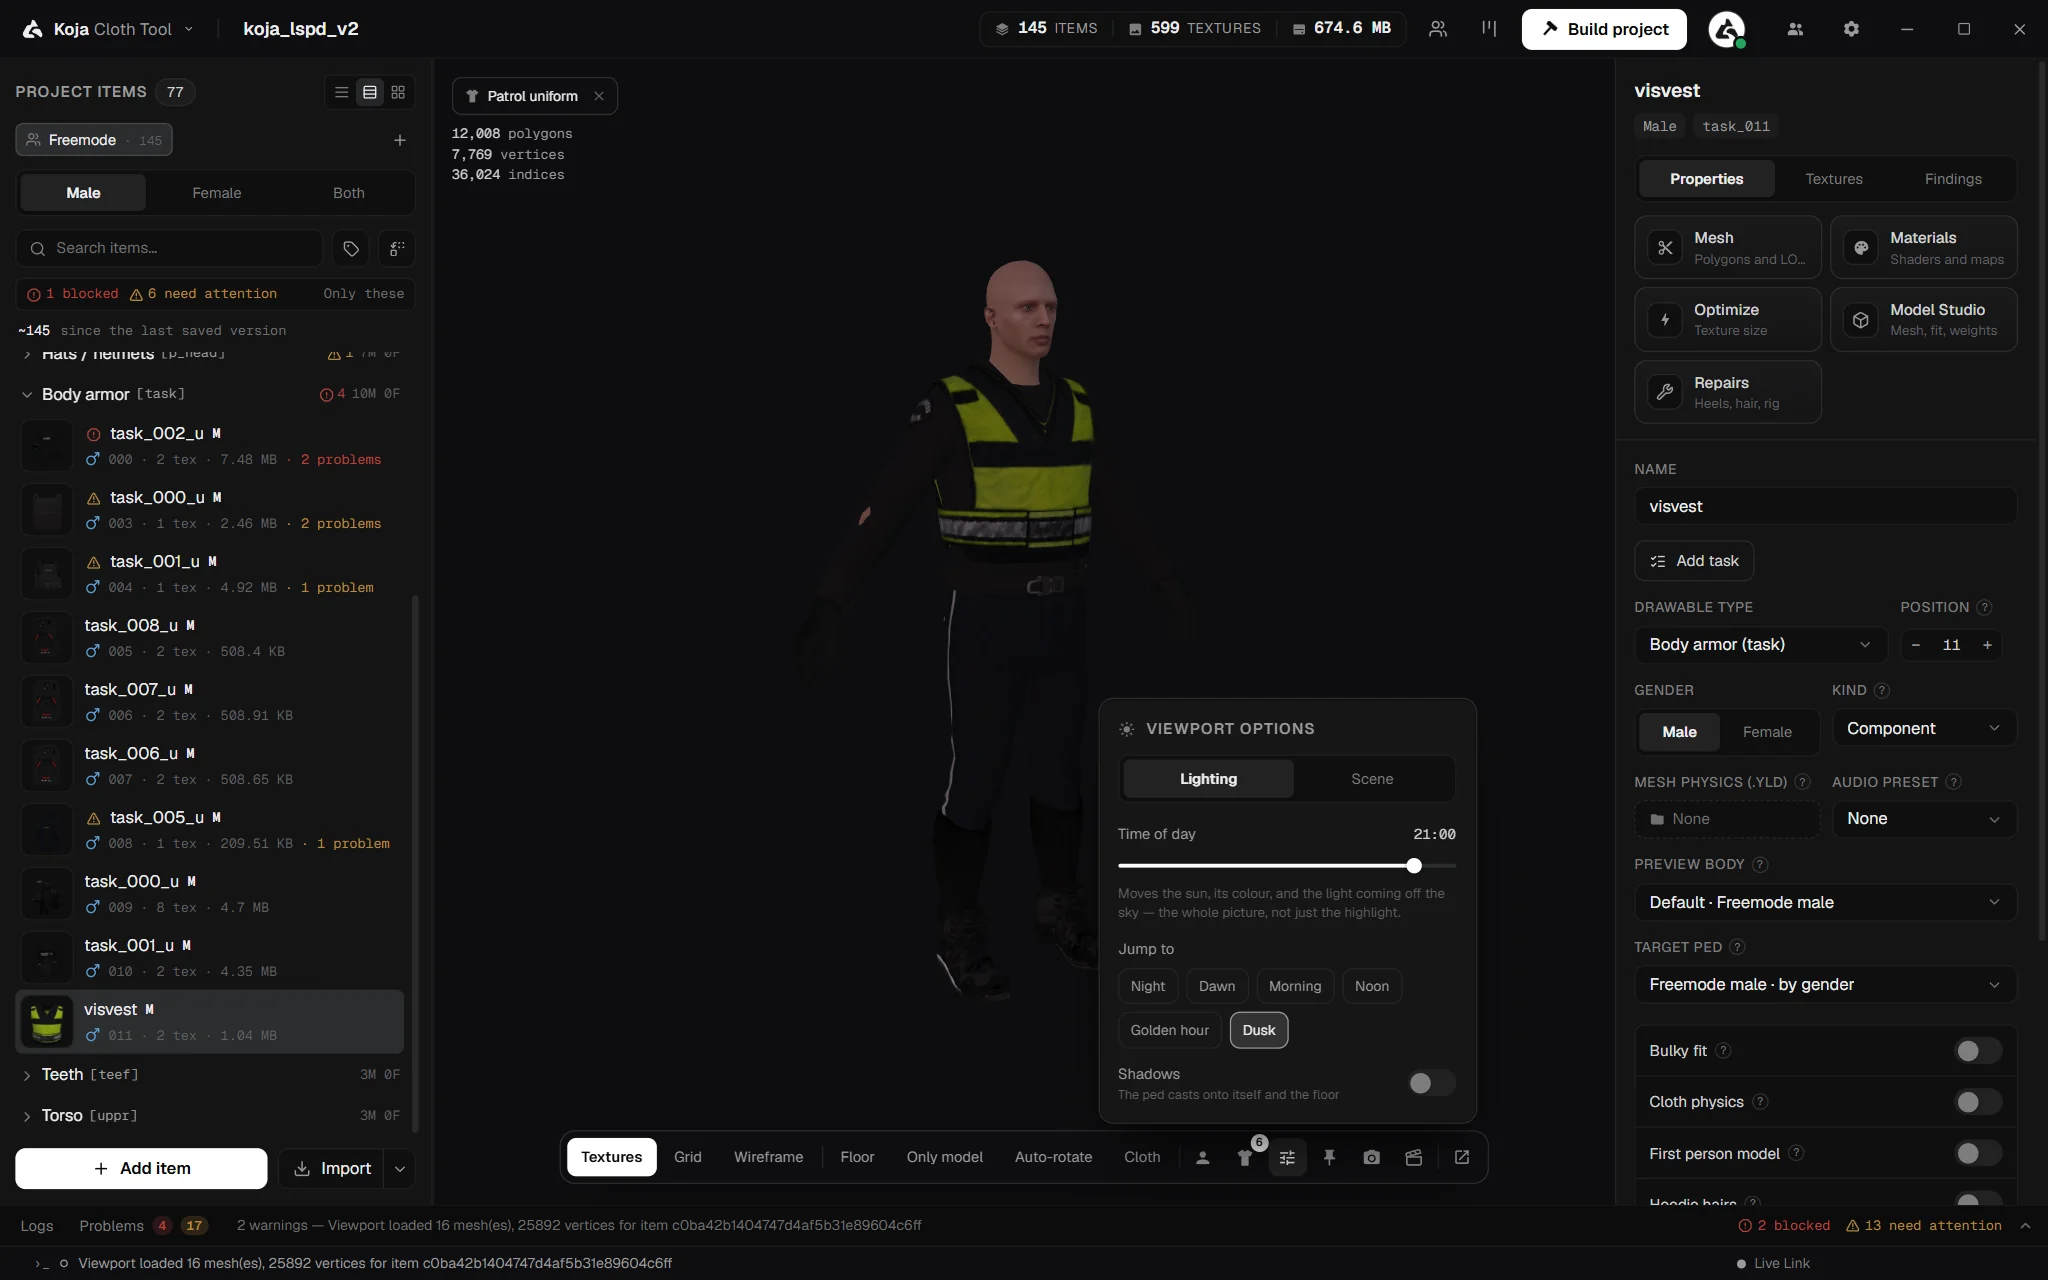
The centre panel shows your garment on a real freemode ped, wearing your actual textures.
The 3D preview with Viewport options open.
Orbit with the left mouse button, pan with the middle or right button (or Shift+drag), zoom with the wheel.
If the model looks dark, open Options — lighting and scene on the preview bar and move Time of day, or pick a preset under Jump to.
Open Appearance on the preview bar to change the ped's body, skin tone and the other clothes it wears, and see how your garment sits with the rest of an outfit.
Turn on an animation (the person icon) to check the garment while the ped walks or runs.
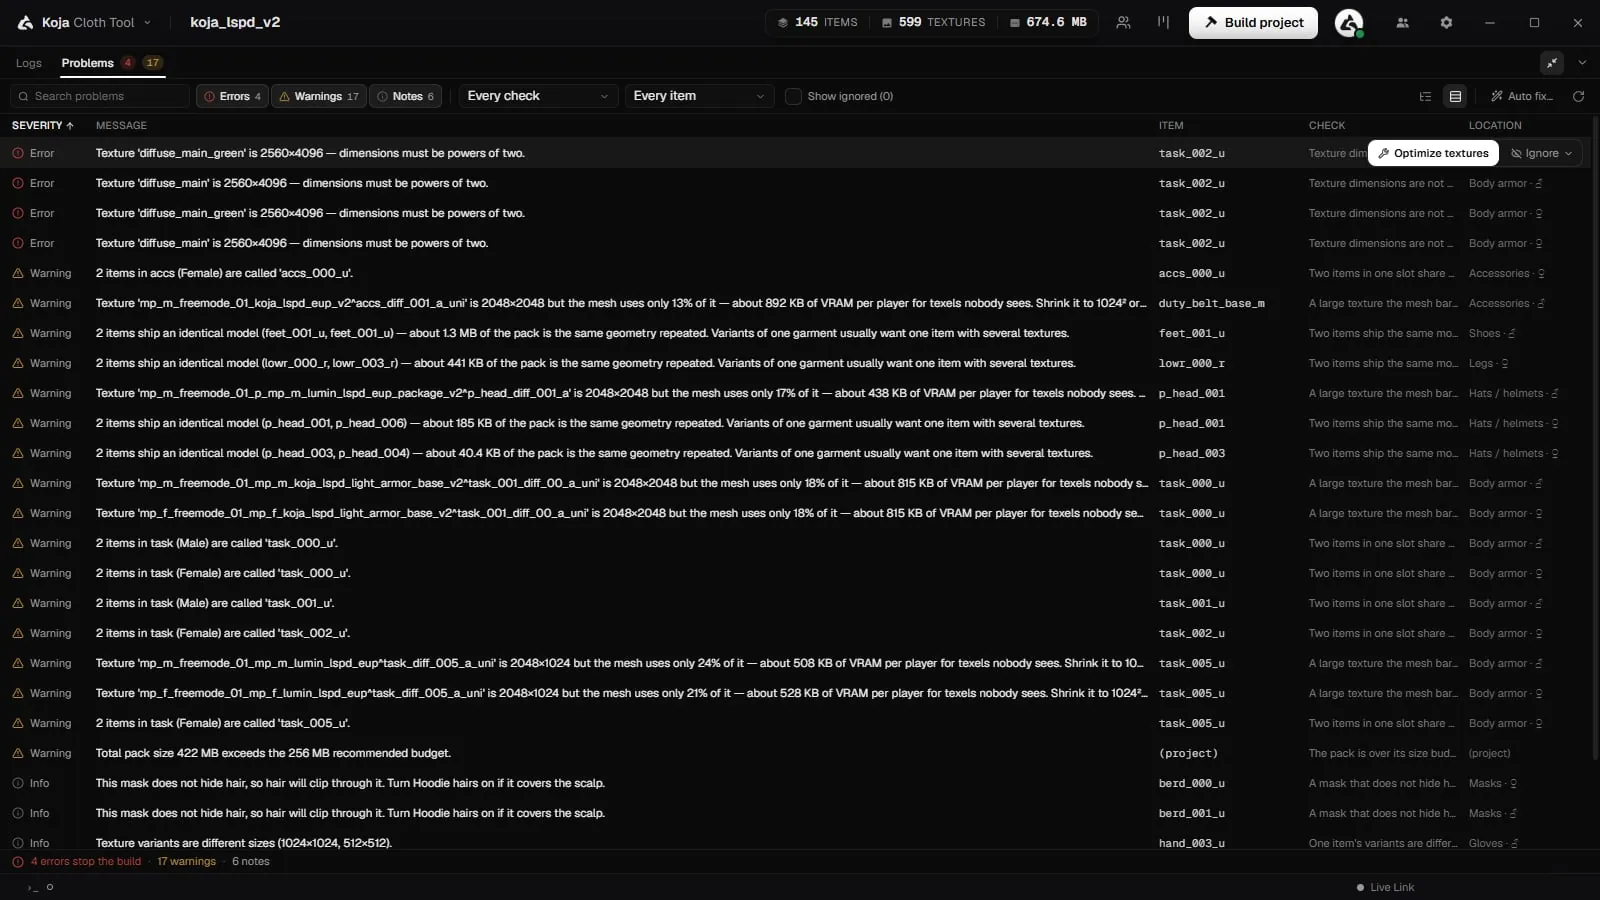
The checks run while you work. Items with a problem carry an icon in the item list; the item's Findings tab says what is wrong and offers a Fix, and the Problems panel (Ctrl+Shift+M) lists every finding in the pack. The build will not start while an error stands, so fix it or ignore it on purpose. See Validation.
The Problems panel lists every finding in the project.
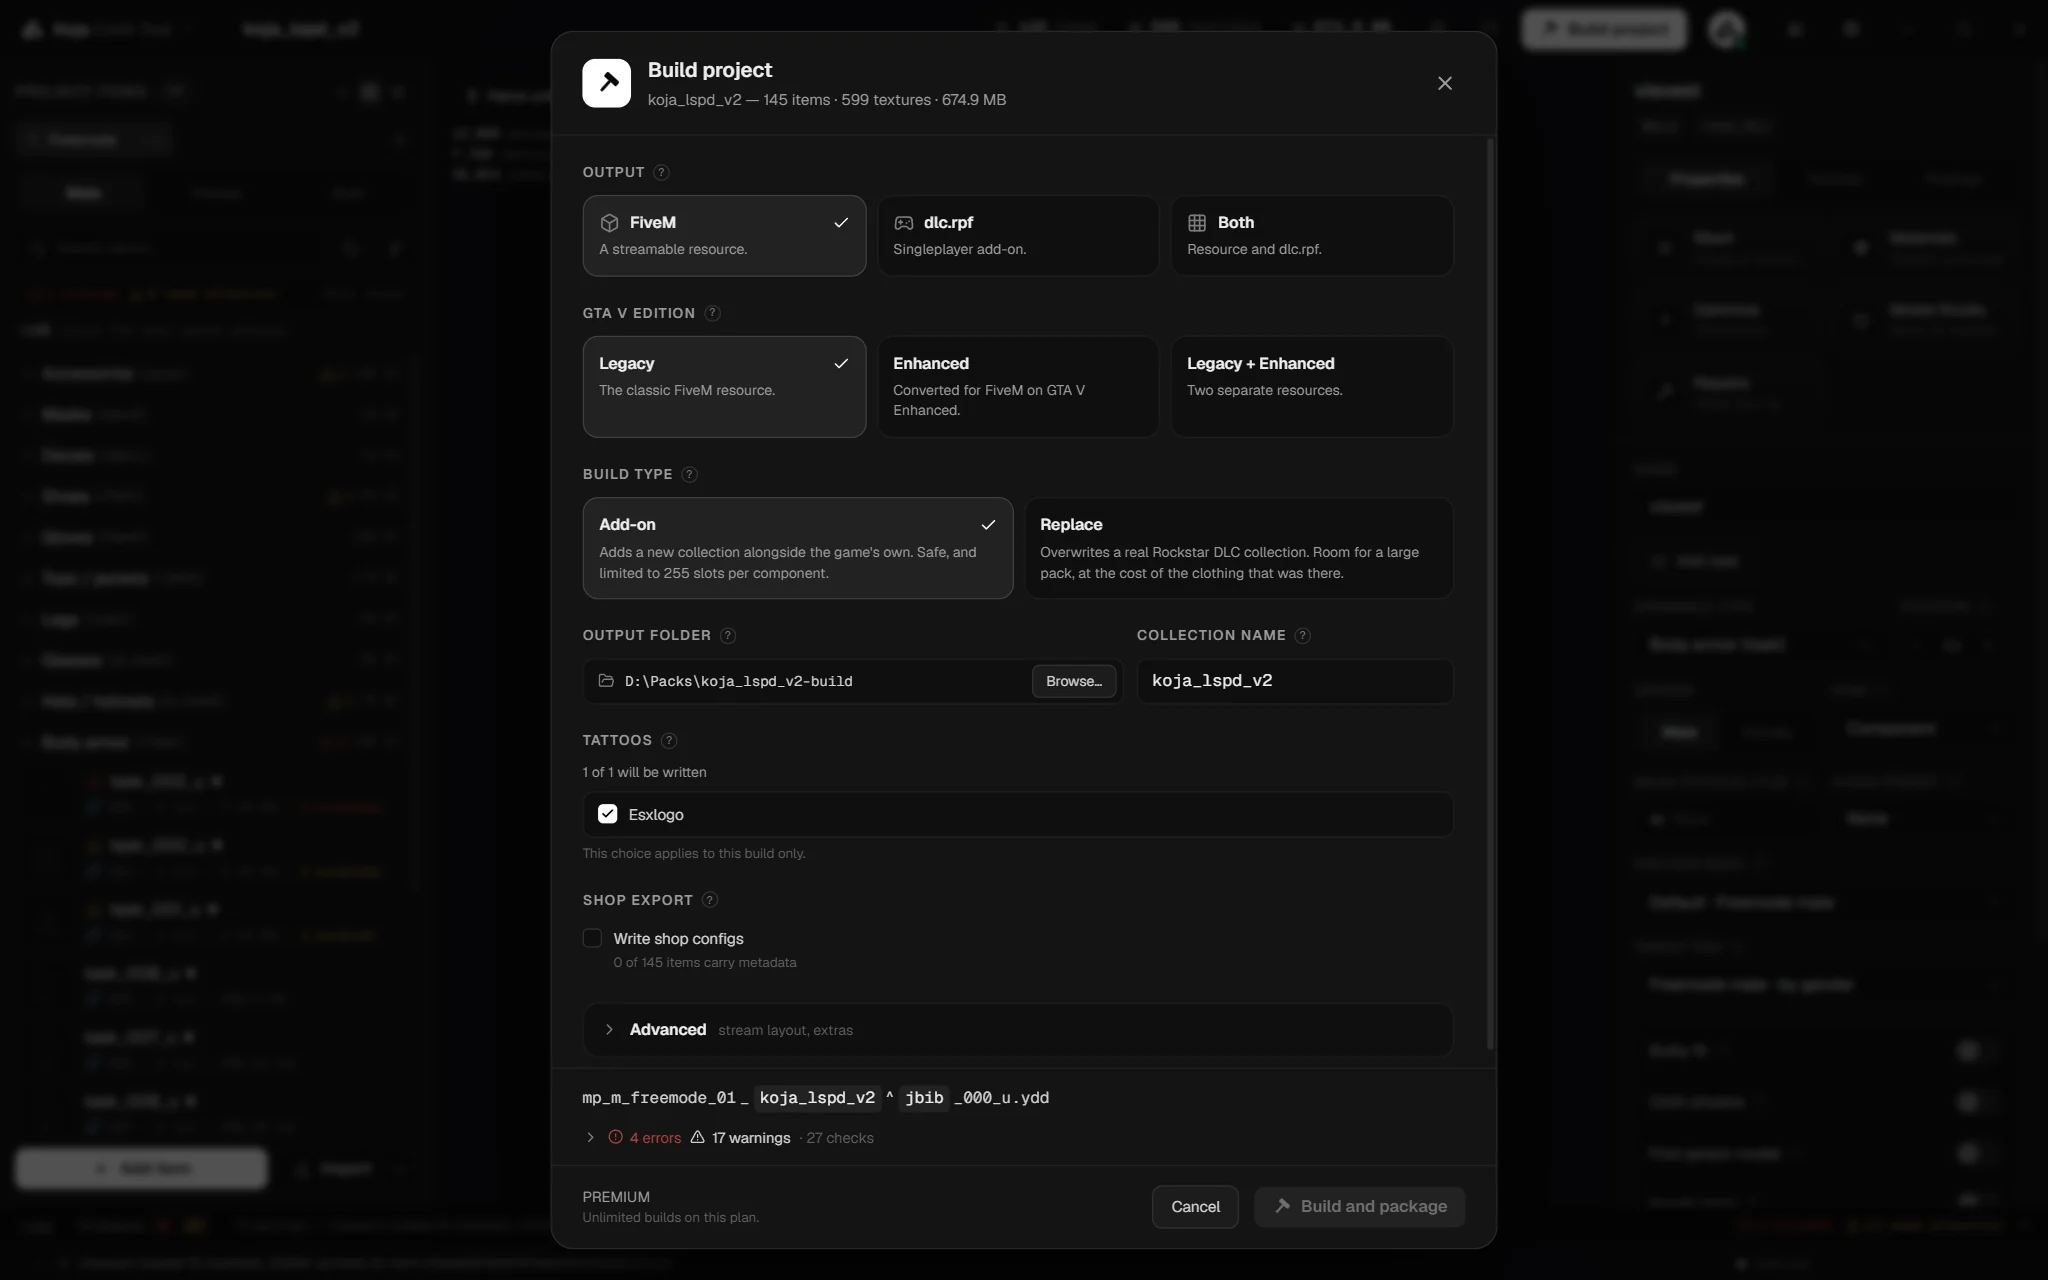
The Build project window.
Click Build project in the top bar. Choose FiveM under Output, the GTA V EDITION, Add-on as the build type, an Output folder and a COLLECTION NAME (the add‑on name for your pack), then click Build and package. The tool writes a complete resource:
Files are renamed to the exact GTA add‑on convention automatically (including your collection name).
The .ymt and shop.meta that make items selectable in‑game are generated for you, plus the creature metadata that makes high heels and hoodie hairs work.
A ready fxmanifest.lua registers everything.
Drop the folder into your server's resources, add ensure koja to your server.cfg, and restart.
The free plan includes 8 builds in total; Premium builds without limit. See Building.